
PressCheck inspects an uploaded image for the print-quality faults that are cheap to fix now and expensive to fix after printing — a background nobody meant to leave on, a drop shadow that will not halftone, artwork that is simply too low resolution for the size it has been placed at. It scores the image out of 100, lists what it found, and offers a fix for most of it.
PressCheck is a Shopify-only feature. It does not exist in the Standalone or WooCommerce versions of the builder, and no equivalent ships there.
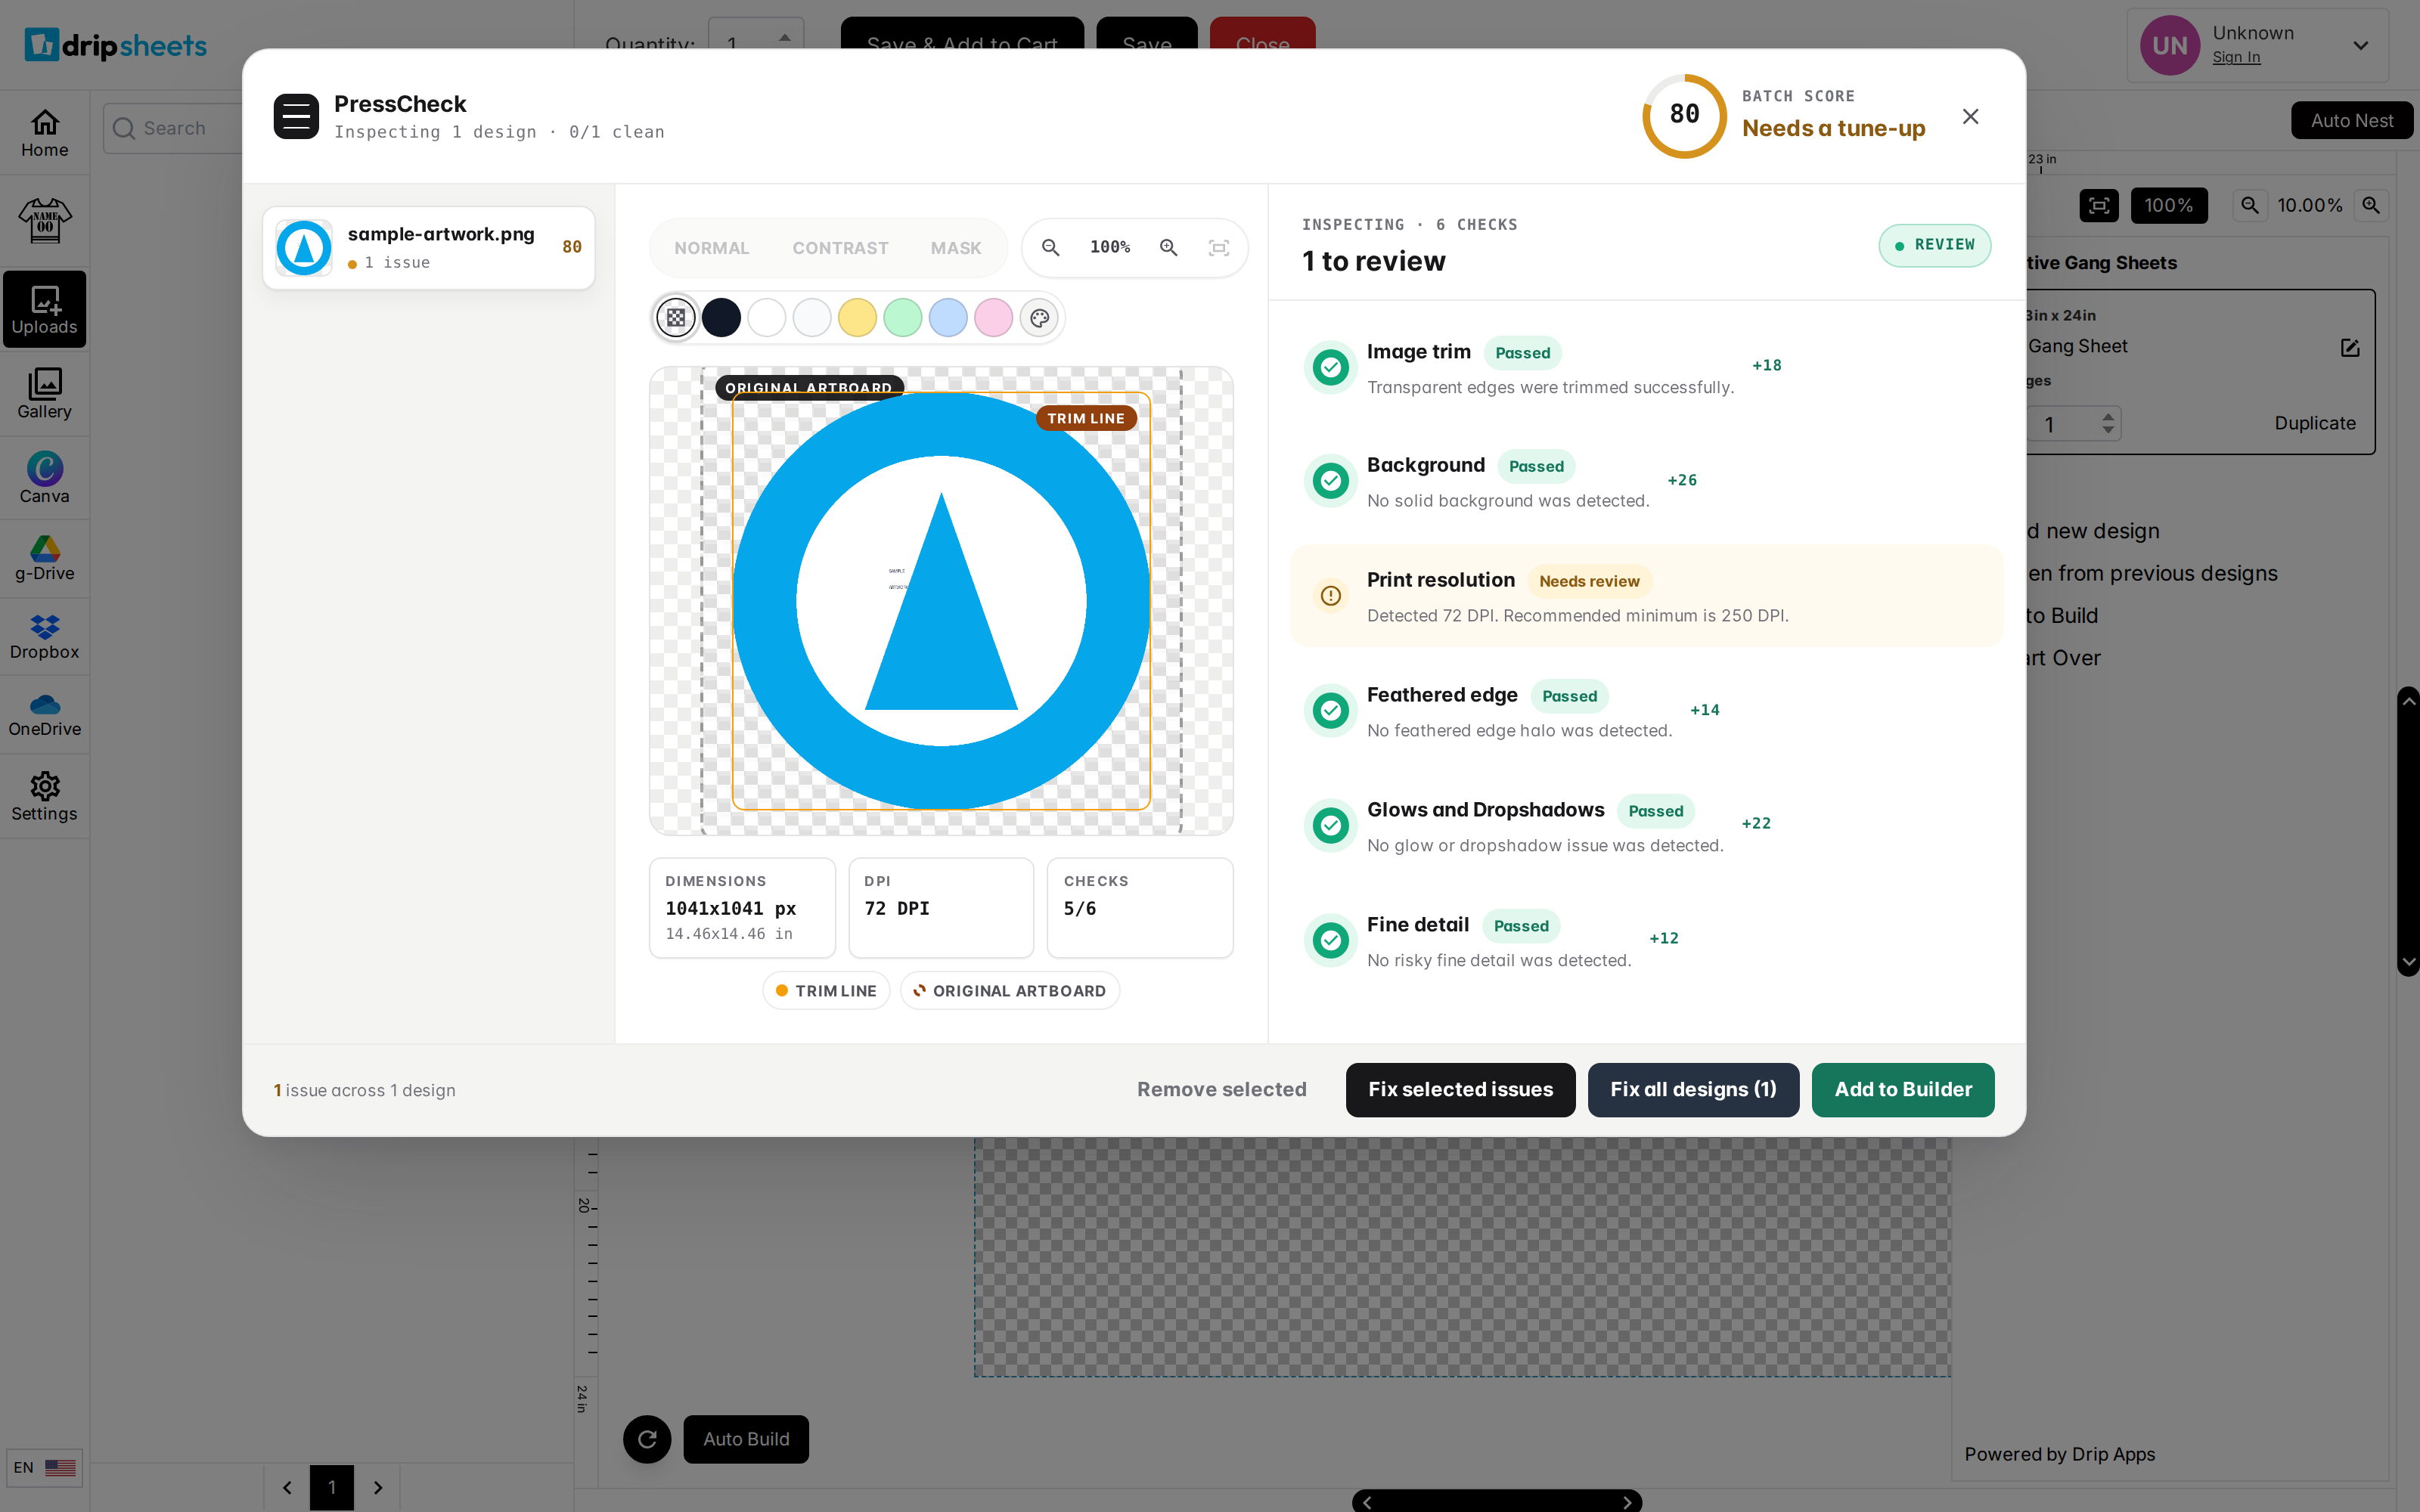
What PressCheck Reviews
Six checks run against each image. Each one carries a weight, and a check that does not pass deducts its weight from 100.
| Check | Weight | What it looks for |
|---|---|---|
| Background | 26 | A solid background left behind the artwork. |
| Glows and Dropshadows | 22 | Soft transparency from glows and drop shadows, which needs halftoning to print properly. |
| Print resolution | 20 | Artwork below 250 dpi at the size it will print. |
| Image trim | 18 | Whether the automatic trim of transparent edges completed. |
| Feathered edge | 14 | A soft, faded halo around the edge of the artwork. |
| Fine detail | 12 | Lines around 4 px or thinner, which may not survive the press. |
Image trim only runs on the automatic check that happens at upload. If you run PressCheck yourself on an image that is already on your sheet, trim is not part of that score.
If a check cannot be completed — the scan itself failed rather than finding nothing — PressCheck lists it as still needing review rather than passing it. It deducts nothing, because not knowing is not the same as finding a fault, but it does stop the image reading as "All clear".
Reading Your Score
A score of 95 or above is labelled Press ready. Below that you see Looking sharp (85 and up), Needs a tune-up (70 and up), or Fixes recommended. There is also a letter grade: A from 94, B from 86, C from 74, D below that.
The panel header reads "Scanning artwork…" while it works, then either "All clear" or the number of items to review. Passed checks show the points they are worth beside them, so a score of 74 next to a failed Background check accounts for itself.
While anything is still unresolved, the score is capped just below 95, so it can never read Press ready over a list of outstanding items.
Fixing What It Finds
Click any check to expand it. Most offer a one-click fix:
| Check | Fix button |
|---|---|
| Background | Remove background |
| Print resolution | Upscale |
| Glows and Dropshadows | Apply halftone |
| Feathered edge | Clean soft edge |
| Image trim | Crop manually — opens the crop editor |
Fine detail has no automatic fix. It is flagged so you can decide whether to thicken the linework or accept it.
Feathered edge also gives you a Cleanup threshold slider before you apply the fix, so you can control how aggressively the soft edge is cut back.
At the bottom of the panel, Fix selected issues applies every available fix to the current image, and Fix all designs does the same across a whole batch of uploads.
A fix your shop has switched off is shown greyed out, with "This fix is not enabled for the current shop settings."
You Can Always Continue
PressCheck is advice, not a gate. The panel says so directly on every fixable item: "You can fix this now or continue and leave it recorded on the design."
The button that takes you on is labelled Add to Builder for a single upload, Add all to Builder for a batch, or Done if you ran the check on an image already placed on your sheet. Clicking it adds the artwork whether or not you fixed anything; the result is simply recorded against the design. During upload review you can also use Remove selected to discard the image instead.
Running PressCheck Yourself
Whether or not the shop has PressCheck running automatically on uploads, you can run it on demand on an image you have already placed:
- Right-click the image on your sheet and choose PressCheck.
- Or select the image and click PressCheck in the settings panel on the right.
- Or, in Auto Build, click PressCheck on the design's card.
Vector artwork is rejected with "Vector artwork does not need a press check." There is nothing here that applies to it.
Turning PressCheck On (Shop Owners)
PressCheck is off by default and is set in two places.
- Open your shop's builder settings and find the Image processing & warnings section.
- Turn on PressCheck. Its description reads: "Inspect uploaded artwork for trim, background, transparency, and print resolution before customers add it to the builder."
- Open any product whose uploads you want inspected and find Customer builder tools in its settings.
- Set Enable PressCheck for that product.
The per-product control inherits from the shop setting until you deliberately differ from it. A product showing a grey Default badge beside Enable PressCheck holds no value of its own and will follow whatever the shop setting says, including any later change you make there. Setting the product toggle to the same value as the shop setting clears the override rather than creating one.
These settings only control the automatic check on upload. Customers can still run PressCheck themselves on a placed image regardless of how they are set.